Monday, March 29, 2010

Mushroom Artichoke Lasagna


A few weekends ago, I went over to Val's to do some ol' fashion friend cooking.  It was a big discussion of what we were actually going to make - mostly because I don't understand how Val ever finds anything to eat.  No bananas, nuts, meat, and more that I'm not thinking of at the moment.  I've really been wanting to make a lasagna, but since I cook for just me - I knew that wasn't anything I could make on my own.  Val found this recipe for Mushroom Artichoke Lasagna on Epicurious - and we were both sold with just the name.


(We also made a Blueberry Peach Pie, which will be coming soon - so stay tuned!)


This really was a phenomenal dish.  I'm not really a huge fan of marinara sauce, mostly because it upsets my stomach.  The earthy flavor of the mushrooms balanced with the acid in the artichokes.  The Béchamel sauce brought the whole thing together for a dish where seconds were a necessary evil.

I believe I've mentioned my love of garlic before...  If not, let me re-iterate.  Any dish where I can throw a half a head of garlic in is going to be an automatic winner in my book!


We used a mixture of portabella and button mushrooms.  (I used to work from home in college and I'd turn Food Network on in the background.  I learned a lot of little tips and tricks that often forget about mentioning - but I'd say them to Val and it made me realize most home cooks don't have that 8 hour a day Food Network education, so I'm going to start making an effort to document them here.)  Mushrooms are like sponges and will soak up water if you wash them by soaking them, which can effect texture and taste.  If they are dirty, take a damp cloth and rub off the excess dirt.  


Saute the mushrooms and garlic in a little extra virgin olive oil.  (Note:  I can't stand Rachel Ray, who I'm sure is very nice in person and has really great ideas - like a trash bowl.  It just drives me nuts when she says things like "sammy" instead of "sandwich."  However, I'm going to start using EVOO, just because it's easier to type.)


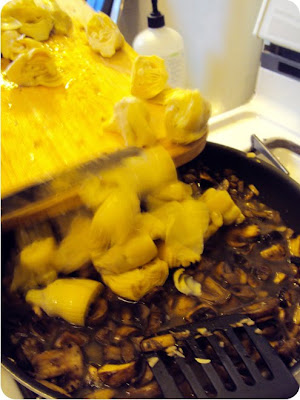
Add in the artichokes and a cup of dry vermouth.  We both tried the vermouth, which we thought would be disgusting, but really is mostly flavorless.
Start the Béchamel sauce while the liquid is evaporating from the mushroom artichoke mixture.  Combine equal parts butter and flour, stirring until all clumps are removed.


Pour in milk.  We used soy milk, which (Val researched) should act just as normal cow milk.  There was a slight issue with it wanting to boil over at points, but we weren't sure if it was from the soy milk, heat to high or maybe not stirring enough.


Stir in grated Parmesan.  We used a mixture of Parmesan and Asiago.  Mmmm - cheese....


Add in nutmeg, pepper and salt.  (I'm really glad Val did this part as I'm a bit of a pansy when it comes to adding spices - I usually under do it, but this was perfect!)


Slice your mozzarella.  Apparently, they sell mozzarella, which can just be rolled out.  We did slice it so it wasn't too cheesy inside the lasagna.


Start with a layer of Béchamel sauce.  


Add a layer of cook in the pan lasagna noodles and mushroom/artichoke mixture.


Right at this moment, Val's punk cat (adorable Bo Jangles) knocked over some margarita salt in the pantry.  (We were drinking wine, not margaritas.)  Also, we decided that there wasn't enough artichokes and mushrooms, so after the mess was vacuumed up, we thawed some frozen, pre-grilled zucchini and eggplant from Trader Joes to mix in.  In retrospect, I'm not sure this was entirely necessary, but it didn't hurt either.


Cover with mozzarella.  Repeat.  


Drizzle more Béchamel over the top, cover and bake.  


For the last 15 minutes, uncover and add some parmesean cheese.  We both agreed the crunchy bits were our favorite.


Seriously, I wish I had a piece right now.  It really cannot have a higher recommendation.


See - this was my plate.  AMAZING! 


Happy cooking.

Saturday, March 27, 2010

Apple Cheddar Stuffed Chicken Breasts


I have been playing catch up with my blog this morning - I've prepped all my pictures of things I've cooked over the last month.  I've set up a schedule for myself so they'll all come out over the next few weeks.  I'm getting better about timeliness and this should help...  This is one I made about a month ago (and wrote about then so I'll share it this morning.)

I was looking through my blog and realized I should have called it, "Adventures in Soupland (or Muffinland)."  I'm not sure if it's been the weather or the new obsession I have with freezing food.  Either way, I make more variety than soup (and muffins), such as these Apple Cheddar Stuffed Chicken Breasts.


I made these when I was sticking to the bland diet.  The roasted fennel, which is supposed to be amazing for stomach health, was roasted with a drizzle of Extra Virgin Olive Oil and Balsalmic Vinegar, which is not part of a bland diet - but I figured they canceled each other out.  This was a delicious dinner, maybe because it was my first solid food in about week.  It'd be perfect in the fall - I know I'm off season...

Start by peeling and chopping an apple.  I used a granny smith apple so it'd stand up better in the cooking process.


Combine with grated cheddar cheese, bread crumbs, brown sugar and a sprinkling of cinnamon.


Put the chicken between parchment paper and pound out the chicken breast with a hammer so it's thin.  Any time I can bring a tool into my kitchen, it's an exciting day. 


Put the apple cheddar mixture over the chicken and roll up.  Secure in place with a few toothpicks.


Melt some butter in a saute pan.


Brown the chicken in the butter.  It's ok if the filling falls out because it'll just add to the flavor of the gravy...  more on that in a moment.


Add in a generous splash of white wine and chicken broth.  Cover and let cook for about 15 to 20 minutes.


If you pay attention to the chicken and don't let the pan burn to a crisp, then you can make what I presume would be a delicious gravy to pour over the top.  Oops!


This meal qualified for the bland diet and was really delicious.  It's one I'll have to remember for those times when my stomach isn't the happiest with me.  


Happy cooking.

Friday, March 26, 2010

Homemade Granola

I'd really been wanting to make some homemade granola.  I hadn't seen a recipe that really stuck out to me until I saw these thick, chewy granola bars from Deb at Smitten Kitchen.  I liked that they were thicker and I'd have something to bite into.  I still have one bar left, but once that one is gone, I'll definitely be making these again - with variations on the nuts, fruit, peanut butter.

P.S. I love Smitten Kitchen - the photos are beautiful, the food is elegant and the writing draws me. 


Jamie Olive, the adorable British chef who has been fighting for a food revolution for a while now, is starting to make a larger splash in America with his new ABC show, which premiers tonight at 7 p.m. CST.  He also did a TedTALKs recently.  If you haven't watched it yet, I highly recommend it.

Process oats until they make an oat flour.


Combine all the dry ingredients together - quick rolled oats, granulated sugar, oat flour (made above), salt and cinnamon.


Pull out whatever nuts or dried fruit you have in the fridge/freezer/pantry.  I love nuts and dried fruit as a snack.  I opted for pecans, almonds, walnuts, dried apples, peaches and cranberries.  Use what you like and have available.  I rough cut them because I like being able to see these things in my granola bars.


Toss in the fruit and nuts with the rest of the dry ingredients.


Combine the wet ingredients - peanut butter (which I was out of so I just omitted and didn't miss at all), vanilla extract, melted butter, honey and water. 


Pour the liquids over the dry ingredients and mush around til everything is just coated.


Spread out in a prepared pan.  I didn't have parchment paper so I just greased my pan; however, my granola did break some when I was moving it out of the pan.


Bake at 350 for 30 to 40 minutes. 


Let it cool completely and remove from pan.  Mine were a little dark/crumbly around the edges and broke off.  I just saved those pieces and have been eating them over yogurt for breakfast.


Cut into bars.


These really are a great thing to have in the pantry for mornings on the go and are less sweet than the granola typically found in grocery stores - Jamie Oliver would be proud.  Remember - tonight at 7 CST on ABC.  Watch it!


Happy cooking.

Tuesday, March 23, 2010

Apple Walnut Muffins

I love making muffins to stick in the freezer.  They defrost over night and usually come out moister than they went in, especially these Apple Walnut Muffins.  These have a nice apple flavor and the crunch of the walnut puts them over the top (for me).  I have a sore throat, achy body and no energy today.  (I feel like I've been sick all late winter...)  I pulled a couple of these out last night and they gave me enough of a boost of energy to write this post!


I followed the recipe pretty closely, except I used whole wheat flour instead of all-purpose and added in some flax meal.   I can't tell a difference and I feel better about eating them.

Grate an apple.  (They say to finely chop, but this seems so much easier.)


Add in the apple to the rest of the dry ingredients - whole wheat flour, brown sugar, granulated sugar, baking powder, baking soda, cinnamon, allspice, nutmeg and salt. 


I squeezed out my shredded apple on the way to the dry ingredients.  It left me with this apple juice, which I tasted.  It was a sweet juice - with no added sugar!  I took just a few sips and ended up dumping it in with the rest of the wet ingredients.  It made me seriously want to consider making apple juice this fall though...


Mix the dry ingredients in with the wet - a large egg, plain non-fat yogurt, vanilla extract, applesauce and melted butter.


Chop some walnuts to add into the mixture.  (I went without the topping that the recipe called for - I figured walnuts inside the muffins would be good without the added brown sugar.)


Pour into prepared muffin tins.  


Bake at 350 for 10 to 12 minutes.  


Sorry about the quality of this picture - I didn't get the glamor shots done til the sun went down...  These muffins are super moist and have a great flavor.  I'm glad that my freezer is full of these today!


Happy cooking.