Thursday, April 8, 2010

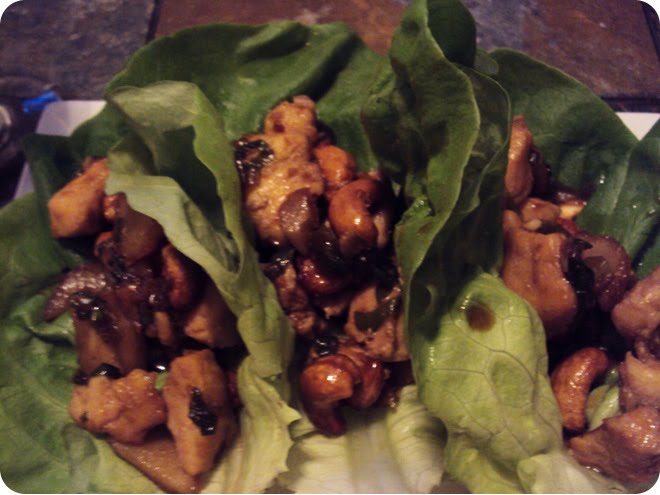
Chicken Lettuce Wraps


I love Real Simple magazine.  I started reading it because I like the clean layout and the handy tips.  However, I got really hooked when I realized how wonderful their recipes were.  They are simple, have few ingredients and most don't take longer than 20 minutes - perfect for weeknights!  (In fact, I have a whole file folder of recipes organized by ingredient that I'm bestowing upon my mom.  Along with my monkeys!!  Thankfully, my mom is awesome.)  Like this Chicken and Cashews in Lettuce Cups recipe from the May 2008 issue, which is also available here.


I've been craving Asian food - but trying not to go out to eat.  So I decided I'd make it myself - be prepared for a few more Asian inspired recipes.  These lettuce wraps have a great balance of heat and cool.  The cashews add a nice harder bite  So simple - perfect for any weeknight!

Start with the sauce - half soy sauce, half honey.


Toast some non-salted cashews in the oven.  Mine got pretty dark - oops!  Still delicious though.

Chop up all the ingredients - garlic, scallions, water chestnuts and ginger - to have ready in a moment.


Start with browning chicken in some oil.  (I believe I used seasame oil to give the chicken some extra flavor.)


Add the garlic and ginger.


In a few moments, once your kitchen is starting to smell of the garlic and ginger.  Add in the scallions, water chestnuts and sauce.  Let cook until chicken is full cooked.  Add in the cashews at the last second.


I used butter lettuce for my lettuce cups.  Make sure you wash and pat dry.


Add the filling to the lettuce and enjoy!


Happy cooking.

Monday, April 5, 2010

Big News!

I have some big news...

I put in my two week notice at my job today and I'm getting ready to move to Yellowstone National Park for the summer! 


I've had this photo at my desk - for when I get frustrated.

That's right - bears, bison, and foxes.  Waterfalls and geysers.  I am so excited for this next adventure to begin.  I realized a few months ago that I'm not quite the city girl that I thought I was - last August to be exact.  There was a meteor shower happening - a show of falling stars waiting for wishes.  I went out into my backyard area (a 10x10 squared in piece of grass that I have to walk down three flights of stairs to get to and share with 5 other apartments) to watch.  I sat out there for about 30 minutes during what was supposed to be the peak of the excitement.  I couldn't see anything.


I started thinking about how when I was a kid - probably about 8 years old - we lived in Hot Springs, AR.  It was this neat little town that was built on these incredible springs that would come out of the ground at scalding hot temperatures.  Teddy Roosevelt used to go their for the "healing powers" of these springs - as well as it being the boyhood town of President Bill Clinton.  There was a mountain behind our house that my family used to go walking through on nice evenings.  There was one evening that we went and there were so many fireflies out.  It felt as if the stars had just fallen out of the heavens and were floating around us.  It was so magical.


I miss this feeling.  I thought I wanted to be in the city, which I'm so thankful for my time in Chicago and the friends that I've made while here.  I need to be somewhere when I can get lost in the beauty of nature.  I know Yellowstone is the other extreme.  It's a summer job - working at a front desk in a hotel.  (If you are at Yellowstone this summer, I'll be a Canyon Lodge - stop by and say "Hi!")  The experience of the (mostly) undisturbed nature here is something that will be unforgettable.

I won't have a kitchen so the topic of my blog might change some.  I definitely want to share my adventures with you.  However, it's also left me wondering what I really want to do with my life.  I've said before that I wouldn't want to be a chef - but I do have a strong passion for food.  (Duh!)  Recently, I read The Omnivore's Dilemma by Michael Pollan.  It's a great book and something that I recommend for anyone who is an omnivore.  It got me thinking more about where my food comes from and just food education in general.  After Yellowstone, (I think) I'm going to try and get an apprenticeship at a sustainable farm.

I specifically want a sustainable farm instead of just something like organic.  Organic farms are great; however, a lot of them are still single crop type farms.  I feel in love with the idea of everything being a cycle.  Cows eat grass.  Chickens eat bugs from cow poop.  Cow and chicken fertilizer grow the grass.  (And so many more...)  I want to learn this type of agriculture through doing.  Eventually, I'd like to have something of my own and work within my community to help educate the importance of eating whole foods (i.e. not processed).

This means that even though I'm not going to have a kitchen, I am going to be educating myself on these things and sharing what I learn here.  I do have a handful of things that I've made and haven't blogged about - so those are still to come.  I'll be sharing my adventures with Yogi Bear and sharing what I learn (and any new developments) as I head down my new path.  
All photos by my friend, Tyson Budd, who worked there last summer.  So excited!!!!

Saturday, April 3, 2010

Lemon Meltaways


Happy Easter (and Passover)!  It's spring!  The trees are starting to bud and daffodils are blooming!  Daffodils are my dad's favorite flower.  Whenever I see them, I always smile a little bit and know it's the simple things in life. 


Then I made these Lemon Meltaways to celebrate the yellow daffodils!  This recipe for Lime Meltaways has been haunting me for the past couple weeks.  The second I saw it, I knew I wanted to make it.  This past weekend I ran across some Meyer Lemons at the store, which I've been seeing posts about everywhere.  I picked some up and wasn't sure what I'd do with them.  Then the Lime Meltaway recipe started haunting me again, so I decided to make it with a couple of the lemons.


They could not have been any easier to make and they really do melt into your tongue.  The second you put it into your mouth, it starts to dissolve.  I wanted a little more flavor of the lemony tart/sweetness so I made a frosting to drizzle over the top.  (I was too afraid that dunking them would cause the cookie to dissolve into the frosting.)

I was really excited about using these lemons.  They are a mellower shade of yellow, but somehow more vibrant at the same time. 


Start with beating together the butter, powdered sugar, vanilla and lemon zest.  For about 5 minutes.


Slowly add in the flour and salt.


Beat for another 5 minutes until light and airy.


Put into a pipping bag (or a zip lock bag).  


This was my first pipping experience so I didn't try to make any shape, but it would be easy to make hearts or another simple shape.


Let them cool a little bit on the pan before trying to move them.  These are light airy cookies and will crumble easily.


While they cooled, I played with Rupert.  He wears a flower collar because he's really a girl.


To make the frosting, combine powdered sugar with just enough lemon juice to drizzle.


Put on a rack to let the frosting the drip down.  


Mmmm!


Happy cooking.

Thursday, April 1, 2010

Blueberry Peach Pie


I've never had homemade pie.  Of course, I've had pie before, but not homemade.  (I love Fried Pies.  My dad always picks some up on his way to mom's from this little roadside shop in the middle of nowhere - and it's always busy.)  At one point, my dad (who is a big pie fan) wanted to create a holiday tradition where we'd make a pie for the holidays, but I'd come over and he'd have a pie crust you unroll and filling in a can.  I'd have my obligatory bite, smile and say, "Mmmm!"  (Sorry Dad!)  I just though I didn't like traditional pie, but after Val and I made this Blueberry Peach Pie (after this amazing Mushroom Artichoke Lasagna!), I realize I've always been a food snob.  Even before I knew homemade was better, I knew homemade was better.


We used a variation on this Blueberry Pie recipe posted by Whisk Kid.  The crust, which I've always liked because my grandma used to make pie crust cookies for me, was buttery and flavorful.  The dough itself was hard to roll out and I'd try a different recipe next time, but the flavor was right on par.  The peaches added an extra layer of sweetness to the blueberries, which I thought put the pie filling over the top.   Holiday 2010 is going to include a homemade pie because I'll actually want it this year!

When measuring out flour for baking, it's always important to spoon flour into the measuring cup and level it off.  If you scoop, then it'll pack the flour in and the measurements wont be exact.  Baking is a science.  (My roommate got onto me for this the other weekend, which was the first time I've done it in ages.  I was just being lazy.)


Mix flour, salt and shortening.  Stick in the freezer.  (Along with a stick of butter, a cheese grater and a plate.)


Once cold, grate the butter on to the plate.  Add to the shortening/flour mixture.  


Mix together with (clean) hands.  


Add in water, 1 tbsp at a time, until it is wet enough to stick together.  We used more like 6 or 8 tbsp, which is double the advised amount. 


Divide in half and create a rounded disk of dough.  Wrap in saran wrap and refrigerate for a few hours. 


While the dough is getting cold, make the filling.  Start with sugar and cornstarch.  Val said that her grandma uses tapioca for her pie thickener and it has a better taste.  Next time...


Add in cinnamon.  Val likes to play with her food, usually by making people or faces out of them.  This is an angry face on a happy day.


Mix in blueberries.


Add in peaches and lemon zest.  Really, add in peaches.  You'll be glad you did.


One of the coolest parts of cooking at Val's is that she lives in a house that had previously belonged to an old family friend, Marge.  She has a lot of Marge's stuff around, like this rolling pin.  It made me really feel like I could have been cooking with my grandma's stuff.  And who doesn't love cooking with their grandmas? 


Val started to roll out the dough but quickly got flustered and left the kitchen.  The dough is crumbly and must be rolled out with care.  Start with a heavily floured working area and rolling pin.  Flip the crust often.  (Near the end, I stopped flipping and had to use a flapjack flipper to get it off the table in one piece.)


If eventually did get rolled out and put into place.  Underneath all this pie filling goodness is a patchwork of pie crust.  


The top went a little more successfully.  Make the edges pretty, brush with an egg wash and sprinkle with raw sugar.


We were watching the Great Muppet Caper and I fell asleep - I really can't sit still and watch anything or this happens.  Val found a puddle of pie filling in the bottom of her oven when she went to pull it out.  So put a cookie sheet under your pie to prevent a headache.  We had it for breakfast the next morning, which means we got natural light! 


Natural light pictures always look so much better.  There really is no substitute for the sun.  This was a lovely little breakfast.


The pie was extremely juicy.  The crust stuck a little bit to the edges, so next time grease the pan.  It was definitely delicious and I'll stop turning my nose up to all pies now.


Happy cooking.

Monday, March 29, 2010

Mushroom Artichoke Lasagna


A few weekends ago, I went over to Val's to do some ol' fashion friend cooking.  It was a big discussion of what we were actually going to make - mostly because I don't understand how Val ever finds anything to eat.  No bananas, nuts, meat, and more that I'm not thinking of at the moment.  I've really been wanting to make a lasagna, but since I cook for just me - I knew that wasn't anything I could make on my own.  Val found this recipe for Mushroom Artichoke Lasagna on Epicurious - and we were both sold with just the name.


(We also made a Blueberry Peach Pie, which will be coming soon - so stay tuned!)


This really was a phenomenal dish.  I'm not really a huge fan of marinara sauce, mostly because it upsets my stomach.  The earthy flavor of the mushrooms balanced with the acid in the artichokes.  The Béchamel sauce brought the whole thing together for a dish where seconds were a necessary evil.

I believe I've mentioned my love of garlic before...  If not, let me re-iterate.  Any dish where I can throw a half a head of garlic in is going to be an automatic winner in my book!


We used a mixture of portabella and button mushrooms.  (I used to work from home in college and I'd turn Food Network on in the background.  I learned a lot of little tips and tricks that often forget about mentioning - but I'd say them to Val and it made me realize most home cooks don't have that 8 hour a day Food Network education, so I'm going to start making an effort to document them here.)  Mushrooms are like sponges and will soak up water if you wash them by soaking them, which can effect texture and taste.  If they are dirty, take a damp cloth and rub off the excess dirt.  


Saute the mushrooms and garlic in a little extra virgin olive oil.  (Note:  I can't stand Rachel Ray, who I'm sure is very nice in person and has really great ideas - like a trash bowl.  It just drives me nuts when she says things like "sammy" instead of "sandwich."  However, I'm going to start using EVOO, just because it's easier to type.)


Add in the artichokes and a cup of dry vermouth.  We both tried the vermouth, which we thought would be disgusting, but really is mostly flavorless.
Start the Béchamel sauce while the liquid is evaporating from the mushroom artichoke mixture.  Combine equal parts butter and flour, stirring until all clumps are removed.


Pour in milk.  We used soy milk, which (Val researched) should act just as normal cow milk.  There was a slight issue with it wanting to boil over at points, but we weren't sure if it was from the soy milk, heat to high or maybe not stirring enough.


Stir in grated Parmesan.  We used a mixture of Parmesan and Asiago.  Mmmm - cheese....


Add in nutmeg, pepper and salt.  (I'm really glad Val did this part as I'm a bit of a pansy when it comes to adding spices - I usually under do it, but this was perfect!)


Slice your mozzarella.  Apparently, they sell mozzarella, which can just be rolled out.  We did slice it so it wasn't too cheesy inside the lasagna.


Start with a layer of Béchamel sauce.  


Add a layer of cook in the pan lasagna noodles and mushroom/artichoke mixture.


Right at this moment, Val's punk cat (adorable Bo Jangles) knocked over some margarita salt in the pantry.  (We were drinking wine, not margaritas.)  Also, we decided that there wasn't enough artichokes and mushrooms, so after the mess was vacuumed up, we thawed some frozen, pre-grilled zucchini and eggplant from Trader Joes to mix in.  In retrospect, I'm not sure this was entirely necessary, but it didn't hurt either.


Cover with mozzarella.  Repeat.  


Drizzle more Béchamel over the top, cover and bake.  


For the last 15 minutes, uncover and add some parmesean cheese.  We both agreed the crunchy bits were our favorite.


Seriously, I wish I had a piece right now.  It really cannot have a higher recommendation.


See - this was my plate.  AMAZING! 


Happy cooking.